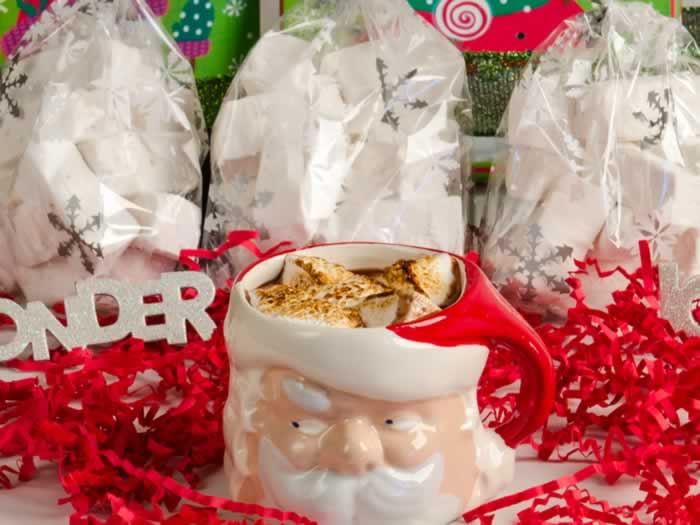
 Homemade Vanilla Marshmallows (Sans Egg Whites)
So what are marshmallows exactly? Simply softened gelatin combined with firm ball-stage sugar syrup, whipped together until white, voluminous, and fluffy. They may or may not contain egg whites. This formula is sans egg whites. The results are beyond delectable. I can’t imagine how they could be any better, but just to be certain, I will test the egg white formula at a later time.
vegetable oil for coating the pan
¾ cup powdered sugar
½ cup cornstarch
½ cup cold water
3 packets (3 tablespoons) unflavored gelatin
2 cups sugar
¾ cup light corn syrup
½ cup cold water
½ teaspoon fine sea salt
2 tablespoons vanilla
- Lightly oil the sides of a 13- by 9-inch cake pan. Line with plastic wrap, smooth out air pockets and wrinkles and lightly oil the wrap.
- In a medium mixing bowl, whisk together cornstarch and powdered sugar.
- Sift 2 tablespoons of the cornstarch-powdered sugar mixture in an even layer over the bottom of the cake pan. Dust the sides with an additional tablespoon of the cornstarch-powdered sugar mixture. Reserve the remainder.
- To prepare the gelatin, in the bowl of a stand mixer fitted with the whisk attachment, stir cold water and gelatin together. Let the gelatin “bloom” for 30 minutes.
- To prepare the sugar mixture, in a 2-quart saucepan, combine sugar, corn syrup, and water and set over medium-low heat. Stir constantly until the sugar dissolves and the syrup clears. To prevent crystallization, do not rush this first step; use a pastry brush dipped in cold water to wash down the sides of the saucepan.
- When the sugar is fully dissolved, raise the heat, bring the syrup to a boil, and stop stirring. Continue heating without stirring until the syrup reaches 240°, about 6 minutes.
- To prepare the batter, remove syrup from the heat and carefully pour the extremely hot syrup over the gelatin into the bowl of the stand mixer.
- Mix on the slowest speed for a minute or so, until the gelatin is melted and incorporated.
- Increase mixer speed to medium and beat for 5 minutes. Beat in the vanilla and salt.
- Increase mixer speed to high and beat for an additional 10 minutes, until the mixture is thick and white but still warm. (The gradual increase of speed will help prevent splattering of the extremely hot syrup. Be very careful when working with hot syrup.)
- Lift the whisk attachment up from the bowl and let the warm batter fall from it into the bowl. Do not try to help this process with a utensil. The mixture is incredibly sticky and you will only make matters worse by trying to get every last bit. When most of the batter has fallen into the bowl, remove the whisk and put it into a sink of hot water.
- To form the marshmallows, spray a metal spatula with vegetable oil spray and use it to scrape the marshmallow mixture from the bowl into the prepared pan. Do not touch the mixture with your fingers.
- Spread the batter as evenly as you can, making sure to get it into the corners.
- Let the marshmallows set, uncovered, at room temperature for up to 12 hours.
- When set, liberally dust a sheet of parchment paper set on the countertop with the remaining powdered sugar-cornstarch mixture and turn the marshmallow slab out onto it. Remove the plastic wrap.
- Using a long sharp knife coated with vegetable oil spray, cut into 2-inch squares. Dust each square with additional powdered sugar mixture.
- To store for up to 1 week, arrange marshmallows in an airtight container and seal.
Copyright 2011 Susan S. Bradley. All rights reserved.

Homemade marshmallows are so much better than the store bought kind – and such a lovely treat for this time of year!
I am a marshmallow maker from way back. Martha Stewart got me going in 2003. Believing them to be a blank canvas for
all kinds of creative ventures I still LOVE the vanilla. Floating around in a cup of hot cocoa or coffee with plenty of Bailey’s
mixed in is fantastic way to end the day. I sub the corn syrup with honey for my tea drinking friends. (Use a larger pot for boiling because the honey comes way up the pan).
I enjoyed this post, Thank you!
Penny, such a nice note, thank you! Homemade marshmallows are a complete revelation. Hope to get into the flavoring options this season.
Every time I see a recipe for marshmallows, I tell myself I’m going to try it. I even watched Ina Garten make some on her show once – actually she was the first to cause that thought to cross my mind. The thing is, as easy as it looks, I just never seem to get around to it. These really look good though and you make them sound even better than they look. Maybe I’ll finally give it a try!